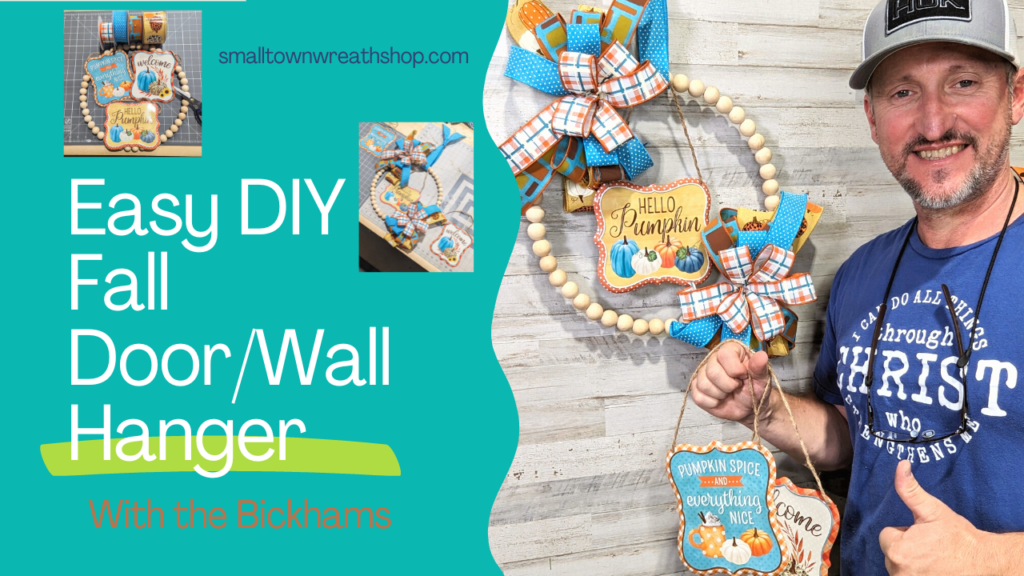
Hey Y’all, it’s Craig from With the Bickhams and Small Town Wreath Shop! Fall is just around the corner, and what better way to welcome the season than with a gorgeous DIY Fall Door/Wall Hanger? In this tutorial, we’ll guide you step-by-step on how to create a stunning decorative piece using a Wooden Bead wreath, our Assorted Fall Embossed Metal Sign Set, and some vibrant Fall wired ribbons. This project is not only fun to make but also versatile, allowing you to interchange the signs and hang them in different ways. Let’s get started!
Materials Needed:
Wooden Bead wreath
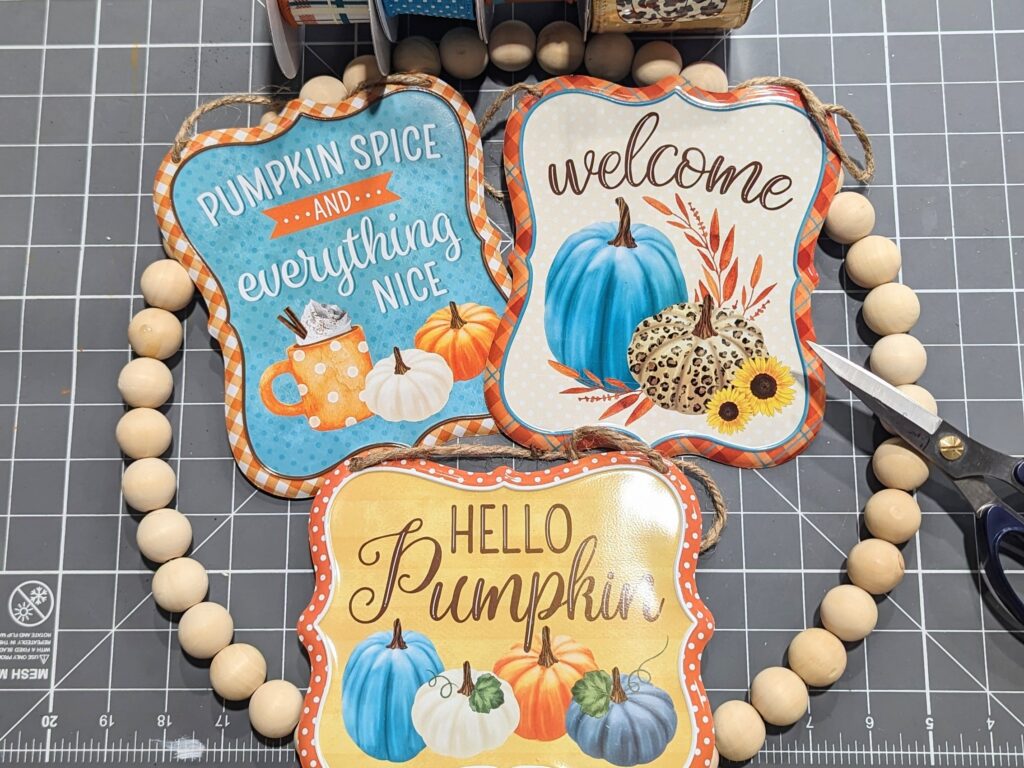
Assorted Fall Embossed Metal Sign Set (7″H x 6″L) from Small Town Wreath Shop
Fall wired ribbons (various colors and patterns)
Scissors
4-in-1 bow maker (or your preferred bow maker)
Hot glue gun and glue sticks
Zip ties
Chenille stems
With the Bickhams YouTube tutorial video (embedded at the bottom of the blog)
Step-by-Step Tutorial:
Gather Your Supplies: Before you begin, ensure you have all your materials ready. Lay them out on a clean and spacious workspace, allowing you to work comfortably and efficiently.
Prepare Your Wooden Bead Wreath: Take your Wooden Bead wreath and inspect it for any loose beads. If needed, secure any loose beads with a small drop of hot glue. This will ensure the wreath looks neat and polished.
Embossed Metal Sign Arrangement: Choose one or more of the Assorted Fall Embossed Metal Signs from Small Town Wreath Shop. You can either hang them individually or create an attractive cluster by arranging them together. Play around with different configurations until you find the one you like best.
Creating the Bows: Using your Fall wired ribbons, craft two 9-inch bows. If you’re new to bow-making, don’t worry! The 4-in-1 bow maker will help you achieve beautiful and uniform bows. Follow the instructions provided with the bow maker, or if you’re using a different bow maker, refer to its guidelines.(Watch my bow tutorial)
Securing the Bows: Attach a zip tie to the back of each bow, creating a loop that will allow you to hang the bows on the wreath. Then, use chenille stems to secure the bows in your desired positions on the wreath. Feel free to get creative and place them at different angles for added visual interest.
Attaching the Embossed Metal Signs: Using the hot glue gun, carefully attach the Embossed Metal Signs to the Wooden Bead wreath. Be sure to hold them in place for a few seconds to allow the glue to set properly. Make sure the signs are secure and aligned the way you want them.
Final Touches: Step back and admire your creation! Make any necessary adjustments to ensure everything is perfectly positioned and secure. If you’re satisfied with the arrangement, trim any excess zip ties or chenille stems for a clean finish.
Watch the Tutorial Video: For a visual guide and additional tips, be sure to watch the complete With the Bickhams YouTube tutorial video embedded at the bottom of this blog. The video will walk you through each step, making the process even more enjoyable.
Conclusion:
Congratulations, you’ve just created a stunning DIY Fall Door/Wall Hanger that will add warmth and charm to your home this fall season! Whether you hang it on your front door or use it as a wall decoration, this project is a fantastic way to showcase your creativity. Don’t forget to subscribe to our With The Bickhams YouTube channel and follow us on all our Small Town Wreath Shop social media pages for more inspiring projects and ideas. We hope you have as much fun making this craft as we did, and we can’t wait to see your beautiful creations! Happy crafting!
I love the polka dot ribbon.