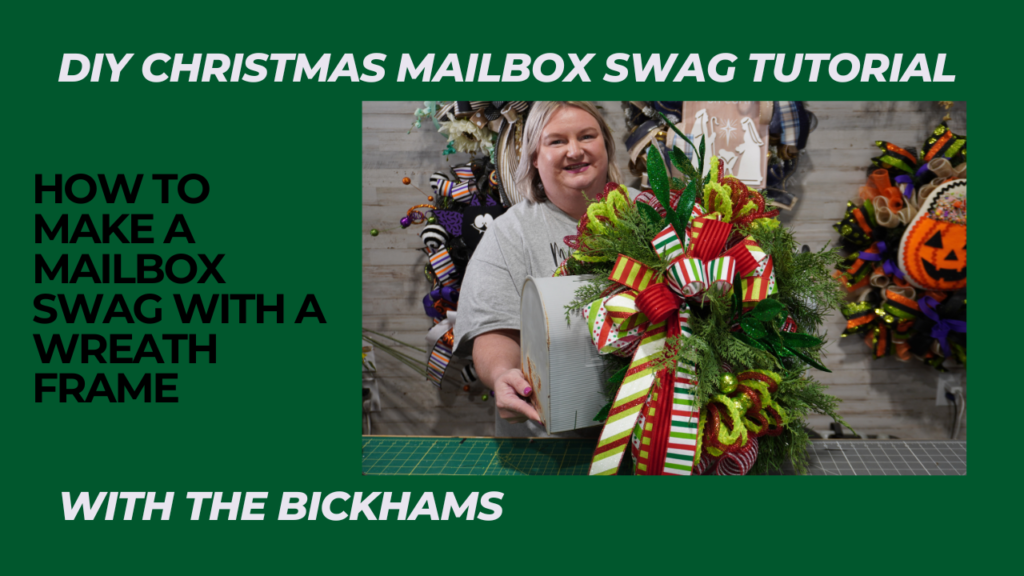
Hey y’all! Craig here from With the Bickhams, and today I’m sharing one of Melissa’s favorite holiday DIY projects — a Christmas Mailbox Swag! This project is easy, fun, and adds a wonderful festive touch to your mailbox. A beautifully decorated mailbox not only welcomes your guests with holiday cheer, but it’s also a fun way to show off your crafting skills to the whole neighborhood. Plus, who wouldn’t want to spread some Christmas joy from their front door all the way down to the mailbox?
One of the best things about this project is that it’s so customizable! Melissa went with a classic Christmas theme for this tutorial, but you can follow the same steps with any colors, picks, and ribbons that you like. It’s all about creating something special that fits your style.

Supplies You’ll Need
Before we jump into the step-by-step instructions, let’s go over the supplies you’ll need for this project. All of these can be found at your local Walmart, craft stores, or online:
- 1 – 24″ Evergreen Wreath Form (Melissa likes the $5 ones from Walmart because they have just one metal ring, making them easier to bend)
- 10.5″ Deco Mesh (enough to make six to eight cruffles. Cut each piece 18 to 20 inches long)
- 2.5″ and 1.5″ Wired Ribbon (choose Christmas-themed colors for a 10″ bow with 20 to 24″ tails)
- Coordinating Christmas Picks and Embellishments (these add the perfect decorative touch)
- Hot Glue (if you want to glue everything in securely)
- 6″ Zip Ties
- Scissors and Wire Cutters
Now that we have everything ready, let’s get started!

Step-by-Step Instructions
1. Shape Your Wreath Form
The first step is shaping your wreath form. The $5 wreaths from Walmart are great because they only have a single metal ring, making them easier to bend. You want to squeeze the wreath frame to form a slight curve so that it fits snugly around your mailbox. Melissa explains this part really well in the video, so if you’re unsure, be sure to watch that before getting started.
2. Add the Deco Mesh Cruffles
Next, let’s add some deco mesh to create volume. Cut the mesh into pieces that are 18 to 20 inches long using either scissors or a rotary cutter. For this project, Melissa shows how to make cruffles using the mesh. To do this, roll up each end of the mesh piece, then pinch the middle to create a puff. This technique adds volume and texture to the swag, making it look full and festive.
Tie each cruffle into the wreath using the pine ties from the evergreen form. Spread them out evenly throughout the swag to achieve a balanced look. This will create a nice, full base for your picks and decorations.
3. Make and Attach Your Bow
Once your cruffles are in place, it’s time to make and attach the bow. Your bow will be the centerpiece of your swag, so it’s important to get it right! Use your 2.5″ and 1.5″ wired ribbon to create a 10″ bow with long 20 to 24-inch tails. The longer tails will give the bow a more elegant look as they drape over your mailbox.
If you need a little extra help with making bows, we have a detailed bow-making tutorial on our channel. And if you want to dive even deeper, Craig offers a full, in-depth tutorial available on Etsy. But if bows aren’t your thing, no worries — you can always buy a premade bow to use instead!
Once your bow is ready, find the perfect spot on your swag and attach it securely using a zip tie or pipe cleaner. Make sure the bow is snug and centered, but leave room for all the picks and embellishments that will come next.
4. Add Your Picks and Embellishments
Now that your cruffles and bow are in place, it’s time to start layering in your picks and embellishments. Start with the greenery picks to create a base, then add the larger leafy picks. Cut the stems at slightly different lengths to add dimension and a more natural look.
Melissa recommends doing a dry fit before gluing anything down. This means arranging the picks and embellishments without securing them, just to see how everything looks together. Once you’re happy with the arrangement, you can start gluing the picks in place or secure them by twisting the pine ties around the stems.
One tip Melissa shares in the video is to work with each piece to help give the project depth and make sure it all blends nicely. This gives the swag a more professional and finished look.
5. Attach the Swag to Your Mailbox
Now that your swag is all put together, it’s time to attach it to your mailbox. You can use wire or a sturdy wired ribbon to secure it in place. Be careful not to tie the swag too tightly over the flag of the mailbox — you’ll want to leave enough space so the flag can still move freely.
Position the swag slightly toward the back of the mailbox to keep everything in place and to balance out the look. Once it’s attached, give it a final fluff to make sure everything is looking just right!
Why Make Your Own Mailbox Swag?
Making your own mailbox swag is more than just a fun holiday craft — it’s a way to personalize your decorations and spread a little extra Christmas cheer. There’s something really satisfying about creating something yourself and seeing it out there for all your friends and neighbors to admire.
Store-bought decorations can be expensive, and they often don’t have the exact look or colors you want. But when you make your own, you get to pick the colors, textures, and style that fit your vision. And since Melissa’s method is so easy to follow, you’ll feel confident creating a stunning piece, even if you’re a beginner.
Another bonus? This is a project that can be done with the whole family. Get the kids involved in picking out the colors or placing the embellishments, and you’ll have a fun holiday memory to look back on.
Tips for Success
Here are a few tips to keep in mind as you create your Christmas Mailbox Swag:
- Start with a base. The $5 Walmart wreath forms are perfect for this project because they’re easy to shape and adjust. Just bend them to fit your mailbox and you’re good to go!
- Don’t rush the bow. The bow is the star of the show, so take your time to make it big and beautiful. And if you need a little extra guidance, be sure to check out Craig’s bow tutorial on Etsy.
- Play with texture and color. Using a mix of textures and colors in your picks will give the swag a more dynamic and visually interesting look.
- Secure everything tightly. When attaching your swag to the mailbox, make sure it’s secured tightly so it doesn’t slide around.
Final Thoughts
Creating your own Christmas Mailbox Swag is not only a great way to add a festive touch to your home, but it’s also a fun and rewarding project. Whether you’re a seasoned crafter or a newbie, Melissa’s step-by-step instructions will have you feeling confident and ready to create a stunning decoration for your mailbox.
Be sure to watch the YouTube video tutorial below to see exactly how Melissa puts everything together. And don’t forget to check out our Amazon Storefront for all the tools and supplies we use in our projects. From glue guns to wired ribbon, we’ve got you covered!
Thank y’all so much for supporting us, and happy crafting from With the Bickhams!
Watch the YouTube tutorial below!
Affiliate Disclaimer and Legal Disclaimer
Affiliate Disclaimer: There are affiliate links on this page. If you click a link and make a purchase, I may receive compensation at no additional cost to you.
Legal Disclaimer: I cannot guarantee any results. All the people on this page who use this product may have results that vary. No guarantees of wealth, fame, or success.
Looking for more DIY holiday projects? Be sure to subscribe to our With the Bickhams YouTube channel for more Christmas crafts, recipes, and home decorating ideas. Merry Christmas, and we’ll see y’all next time! 🎄

