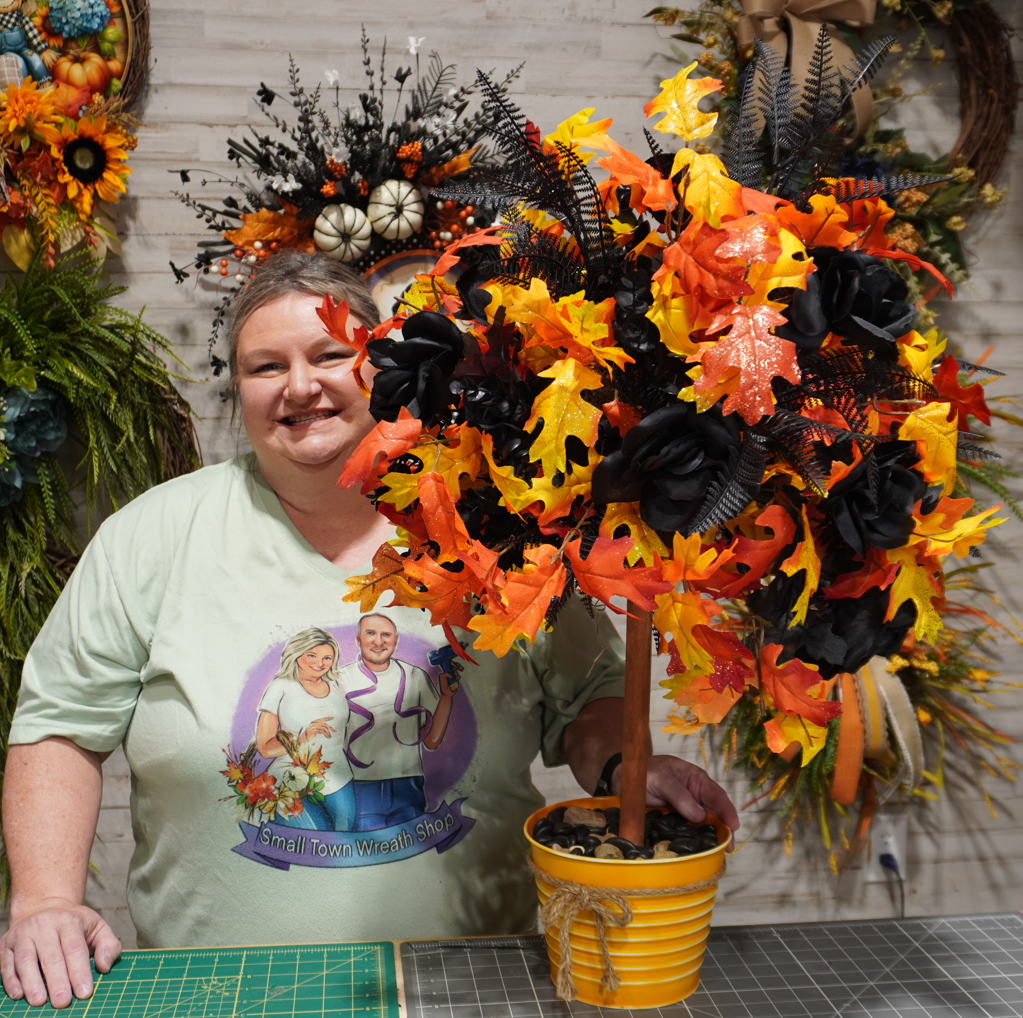
DIY Holiday Decor with a Plunger and Fall Florals
Hey y’all, it’s Craig here from With the Bickhams! Today, we’ve got a fun and creative DIY project that Melissa just finished up, and let me tell you – it’s perfect for anyone who loves decorating for the holidays! We’re talking about a Falloween Tree, a great way to combine the spooky vibes of Halloween with the warm, cozy colors of Fall.
This project is simple, affordable, and a blast to do with the kids or grandkids. With just a few supplies (including a plunger – yep, you heard that right!), you can create a cute and crafty tree that’ll bring some Falloween spirit to your home.

What is Falloween?
Before we dive into the DIY, let’s talk about Falloween. It’s become a hot trend in recent years, blending the fun of Halloween with the beauty of Fall. Instead of switching decorations right after Halloween, Falloween lets you extend the spooky season while keeping everything festive and colorful as you head into November. It’s the best of both worlds!
Falloween decor tends to feature a mix of traditional Halloween colors like black and orange with warm Fall tones like yellows, reds, and browns. And since this Falloween Tree is all about creativity, you can really make it your own, decorating it however you like to celebrate this fun, transitional season.
Now, let’s get started on making your own Falloween Tree!
Materials You’ll Need:
Here’s what you’ll need to get started on this fun DIY project:
- One cheap plunger (yep, it’s the base of your tree!)
- A small decorative metal bucket (the plunger handle needs to fit inside)
- A Styrofoam ball or floral foam (for the “tree” base on top)
- Rocks (to weigh down the bucket and keep the tree stable – you can use ones from your driveway!)
- Fall florals (preferably in orange, yellow, black, and even red if you like)
- Moss (to cover the Styrofoam ball)
- Floral U-pins (to attach the moss to the foam)
- Gluepot or glue gun (for securing florals and moss)
- Scissors or floral cutters (to trim your florals)
- Optional: Black colored rocks (for added decoration on top)
Step-by-Step Instructions:
1. Prep the Styrofoam Ball
First things first, grab your Styrofoam ball or floral foam and cut a small hole in the bottom, about 3/4″ to 1″ deep. This is where you’ll insert the handle of the plunger.
Once you’ve got your hole cut, add some glue (using your glue pot or glue gun) into the hole and quickly press the foam onto the top of the plunger handle. Hold it in place until the glue sets. This will form the base of your Falloween tree.
2. Cover the Foam with Moss
To cover up the foam and give your tree a more natural look, use moss. Take your floral U-pins and start pinning the moss onto the Styrofoam ball. Cover the entire ball with the moss until it’s completely hidden. If you use glue instead of pins, it’ll be hard to insert the floral stems later on, so we recommend sticking with U-pins for this part.
3. Arrange the Fall Florals
Now for the fun part – adding the Fall florals! Using scissors or floral cutters, trim the florals into individual pieces at different lengths. This will give your tree some dimension and make it look more natural.
One by one, take each floral stem, add a dab of glue to the end, and stick it into the Styrofoam ball. The trick here is to work from the top down, building out the shape of your tree as you go. Alternate the lengths of your floral stems to create a full, rounded tree shape.
Be sure to watch Melissa’s YouTube tutorial at the bottom of this post for a step-by-step guide on how to arrange the florals!
4. Secure the Plunger in the Bucket
Once the top of your tree is complete, it’s time to get the base set up. Take your small metal bucket and place the plunger handle inside. To keep it stable, fill the bucket with rocks. This will weigh it down and keep the tree from tipping over.
For an extra festive touch, we added some black decorative rocks on top of the regular rocks from our driveway. It gives the base a more finished look and adds to the Falloween theme.
5. Optional: Stain the Plunger Stick
If you want to go the extra mile, you can stain or paint the plunger handle to match your decor. This step is totally optional, but it’s a fun way to customize your Falloween Tree even further.
Why Make Your Own Falloween Decor?
There’s something so special about creating your own holiday decorations. It’s not just about saving money (although that’s a nice perk!); it’s about the memories you create while crafting, especially if you’re doing it with kids or grandkids. They’ll love helping you pick out florals, and arrange the tree, however the glue should be handled by an adult. Plus, every time you see the finished product, you’ll be reminded of the fun you had making it.
DIY projects like this one allow you to personalize your home for the holidays in a way that store-bought items just can’t. You get to choose the colors, the materials, and the overall design, making it uniquely yours. And with Falloween decor, you can keep it up from late October all the way through Thanksgiving – two holidays in one!
Final Thoughts
This Falloween Tree project was a blast to make, and I know you’ll love it too. It’s a simple and affordable DIY that’s perfect for adding a little spooky fall magic to your home. Whether you’re decorating for Halloween or just want a fun project to do with the family, this tree is a great way to get creative.
Thank y’all so much for supporting us! Be sure to follow us on all of our social media sites for more DIYs, recipes, and tips from With the Bickhams.
And don’t forget to check out our Amazon Storefront for all of our favorite crafting tools.
Happy crafting, and we’ll see y’all next time!
Watch the YouTube video tutorial below!
Affiliate Disclaimer and Legal Disclaimer
Affiliate Disclaimer: There are affiliate links on this page. If you click a link and make a purchase, I may receive compensation at no additional cost to you.
Legal Disclaimer: I cannot guarantee any results. All the people on this page who use this product may have results that vary. No guarantees of wealth, fame, or success.

