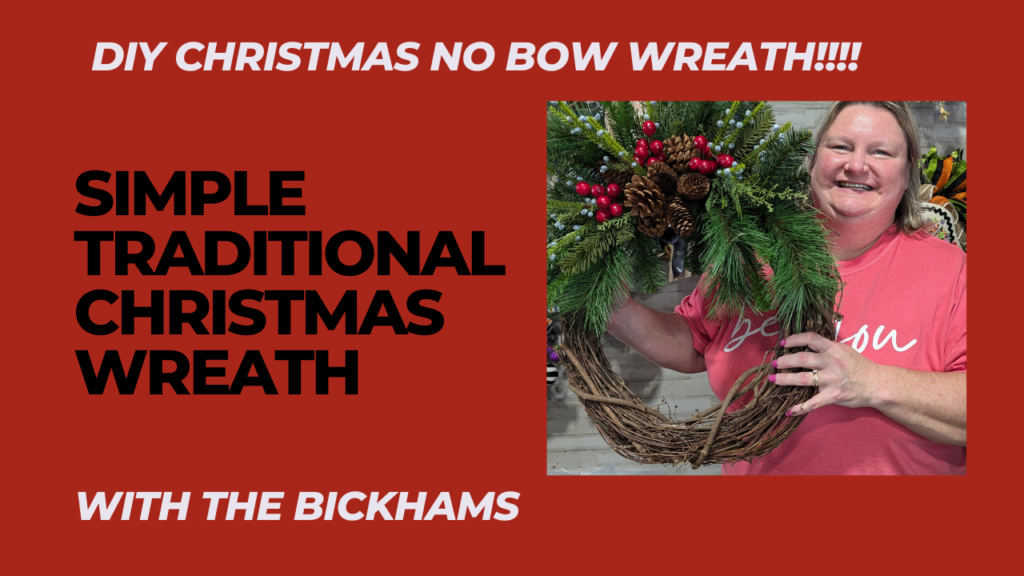
Creating a Christmas wreath has always been a special tradition, bringing that warm, nostalgic feeling of holidays gone by, back into our homes. There’s something beautifully simple and satisfying about putting together a wreath by hand, especially one that’s inspired by traditional Christmas decor. With this no-bow Christmas wreath, Melissa and I are embracing a style that’s simple, classic, and full of the natural charm of the season.
This DIY project is designed to be quick and easy. It’s ideal for anyone who loves traditional holiday decorations and wants a wreath that brings the beauty of pine, berries, and cedar together in a natural look. Let’s dive into the supplies you’ll need and the steps to make this lovely, traditional wreath with minimal supplies. Ready to get started?

What You’ll Need to Make This Traditional Christmas Wreath
Here’s a quick list of what you’ll need for this easy DIY project:
- 18″ Grapevine Base – A sturdy base that’s perfect for the natural look.
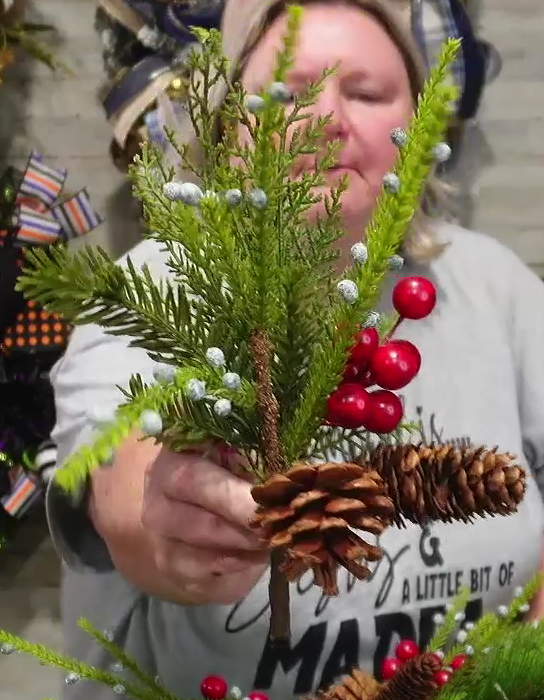
- 3 to 4 Full Greenery Stems – Look for stems that feature a mix of pine, cedar, pine cones, and berries to give it that classic, woodsy feel.
- Hot Glue – Essential for securing your greenery to the base.
- Zip Ties – These will help secure heavier stems or elements.
- Wire Cutters – You may need these for trimming stems to your desired length.
Each of these items can be found at craft stores or ordered from our With the Bickhams Amazon Storefront, where we list our favorite supplies and everyday essentials.

Step-by-Step Guide to Making a No Bow Christmas Wreath
Step 1: Arrange Your Greenery Stems
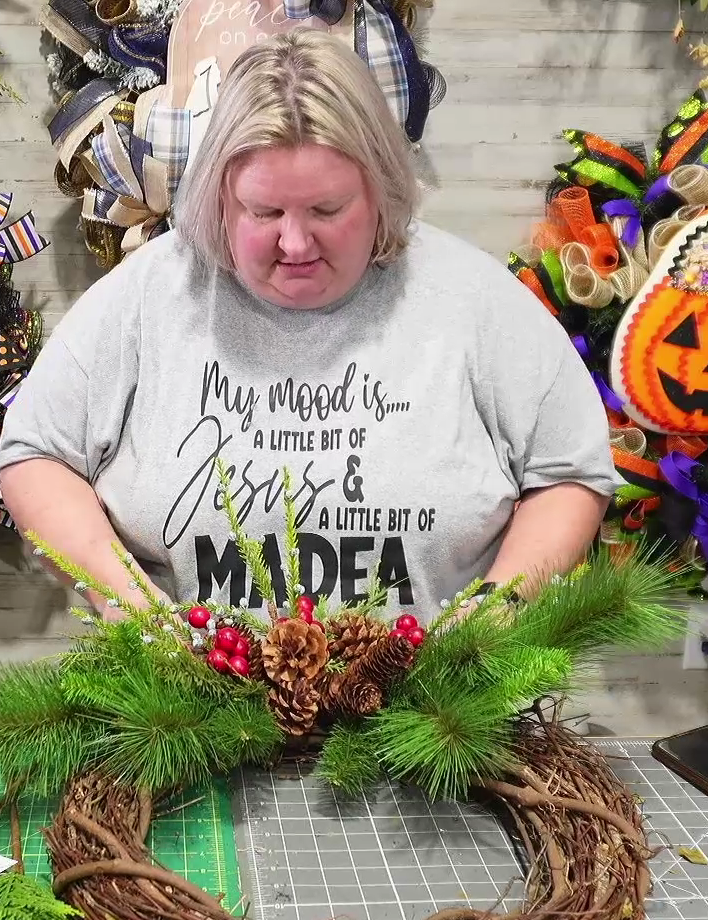
Begin by laying your greenery stems on top of the grapevine base without attaching anything just yet. This is a great way to experiment with placement and get a feel for the overall look. Try different arrangements, varying the placement and direction of the greenery to find the layout you like best.
Once you’ve got a design you love, keep that mental image (or take a quick photo!) before moving on to the next step. This stage is all about envisioning what you want your wreath to look like, so take your time here.
Step 2: Trim Your Greenery Stems
After deciding on your layout, it’s time to start trimming your greenery stems. Using your wire cutters, cut the stems at different lengths to create layers that add depth and interest. Start with the longest stems at the bottom and work up, gradually making each layer slightly shorter.
When working with pine and cedar stems, you may find that some pieces are thicker and need extra strength to cut. This is where a good pair of wire cutters comes in handy. Just be mindful to keep stems long enough to secure to the wreath but short enough to prevent a messy look from behind.
Step 3: Attach Your Greenery to the Grapevine Base
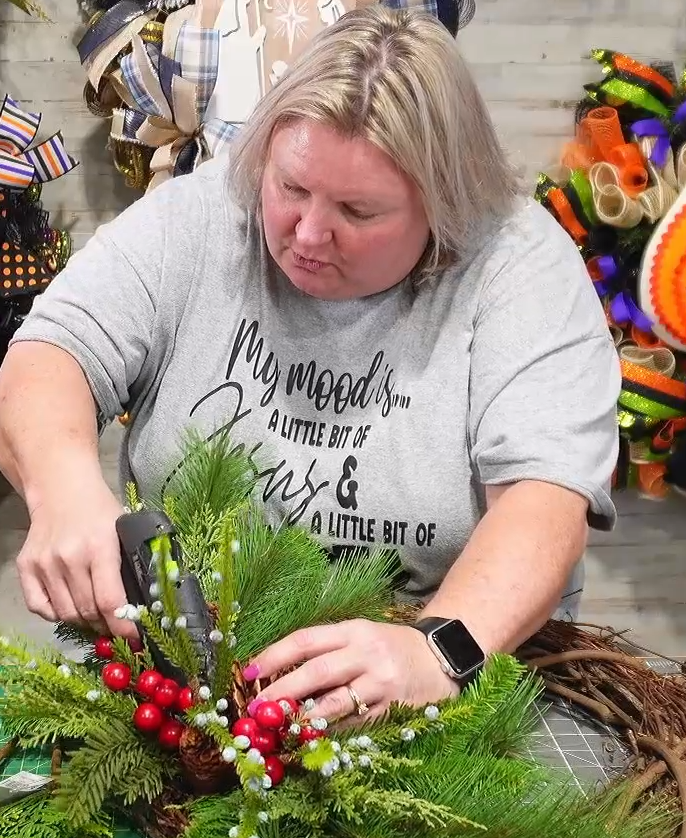
Now, let’s start putting everything together! Take each stem one at a time, dip the cut end into hot glue, and press it into the grapevine wreath. Instead of sticking the stems straight in, lay them in the same direction as the grapevine and angle them slightly. This way, the greenery appears to flow naturally with the shape of the wreath.
Continue layering each stem, starting from the longest pieces on the bottom and adding the shorter pieces on top. Be sure to fluff the greenery as you go, adjusting and arranging it to fill in any gaps and create a balanced, natural look. Don’t worry if some stems stick out the back; you can trim these off later for a cleaner finish.
Step 4: Add the Finishing Touches with Pine Cones and Berries

With your greenery securely in place, it’s time to add the final touches. Cut any remaining stems or picks into smaller pieces, especially those with pine cones and berries. These details bring a pop of color and texture to the wreath and give it a focal point, especially in the area where a bow would traditionally go.
Place the pine cones and berries in a cluster near the bottom center of the wreath, layering them naturally to create a fuller look. This step adds a beautiful finishing touch and completes the wreath without needing a bow. The pine cones and berries bring in that classic Christmas look, creating a wreath that’s both simple and timeless.
Step 5: Secure Everything
Once all the greenery, pine cones, and berries are arranged to your liking, take a moment to make sure everything is secure. If you see any loose pieces, add a bit of hot glue or use a zip tie for extra stability. A few zip ties can help reinforce the arrangement without adding any bulk or distraction.
Embracing Traditional Christmas Decor
There’s something truly special about traditional Christmas decor. It brings back memories of simpler times when decorations were all about natural beauty — pine branches, berries, and cedar filled our homes with that unmistakable holiday scent. For many of us, a classic wreath like this one is a nod to those cherished memories, reminding us of family gatherings, holiday dinners, and everything that makes Christmas special.
Making your own Christmas wreath is also a wonderful way to add a personal touch to your holiday decor. When you create a wreath by hand, you get to choose the colors, textures, and layout that speak to you. Not to mention, it’s an affordable and meaningful way to decorate, allowing you to enjoy the process and make something that’s uniquely yours.
Tips for Crafting Success
Here are a few tips to keep in mind as you work on your wreath:
- Use Quality Greenery – Investing in good-quality greenery can make a big difference in the look and longevity of your wreath.
- Plan Before You Glue – Take your time arranging the stems before attaching them to get a feel for the final look.
- Balance Your Design – Place greenery and accents evenly around the wreath for a balanced, full appearance.
- Add Layers for Depth – Use layers to give your wreath a fuller look. Starting with longer pieces and working up to shorter ones helps achieve this effect.
Watch the Full Tutorial
If you’re ready to start crafting but need a little more guidance, be sure to watch Melissa’s full video tutorial below! Seeing the steps in action can really help you visualize how to arrange and attach each piece. And while you’re there, we’d love for you to subscribe to our With the Bickhams YouTube channel. We’re always sharing new DIY projects, recipes, and home decor ideas to keep you inspired!
Final Thoughts on Making Your Own Traditional Christmas Wreath
Creating your own Simple No Bow Traditional Christmas Wreath is not only a fun project but also a meaningful way to bring that nostalgic holiday spirit into your home. With just a few supplies, a little bit of time, and some creativity, you can make a wreath that looks beautiful and adds a touch of tradition to your decor.
We hope this tutorial inspires you to get crafty this holiday season and bring a little extra Christmas joy to your home. Don’t forget to check out our Amazon Storefront for our favorite supplies and tools that make crafting even easier.
Thank you so much for following along, and happy holidays from With the Bickhams!
Watch the YouTube Tutorial Below!
Looking for more DIY holiday projects? Be sure to subscribe to our With the Bickhams YouTube channel for more Christmas crafts, recipes, and home decorating ideas.
Affiliate Disclaimer and Legal Disclaimer
Affiliate Disclaimer: There are affiliate links on this page. If you click a link and make a purchase, I may receive compensation at no additional cost to you.
Legal Disclaimer: I cannot guarantee any results. All the people on this page who use this product may have results that vary. No guarantees of wealth, fame, or success.

