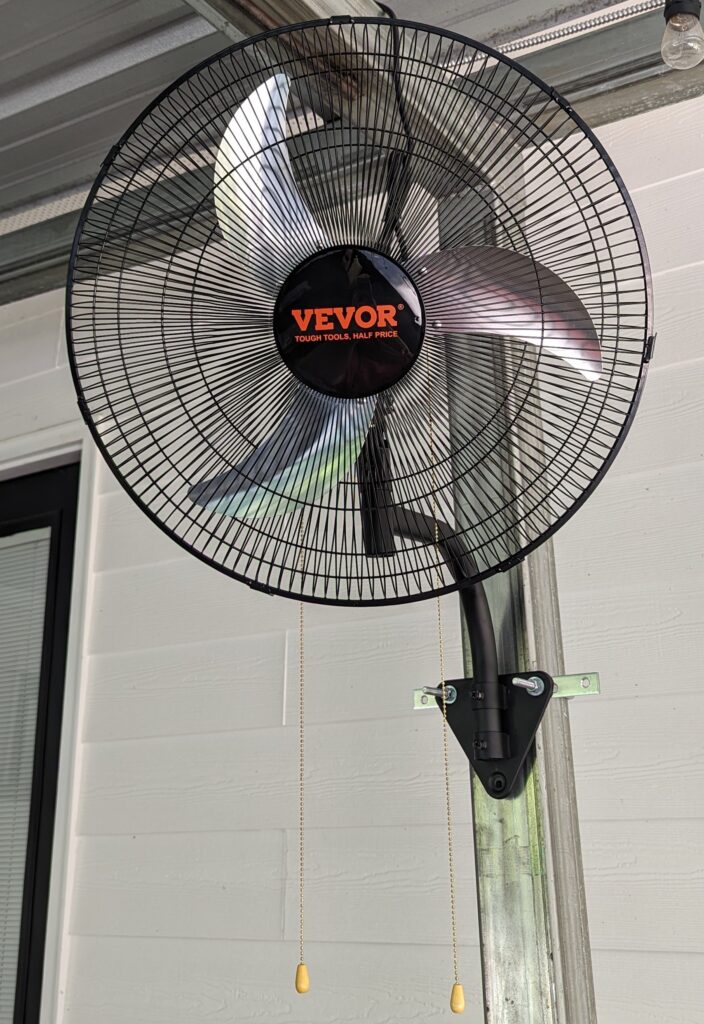
Welcome back, friends! Craig here from With the Bickhams, and I have an exciting new project that’s going to transform our patio into the ultimate hangout spot. Today, I’m walking you through the installation and review of our brand new VEVOR Wall Mount Fan, specifically the 2 pack 20 inch Oscillating Fans. These fans are game-changers for anyone looking to maximize their outdoor space. So, grab a cup of coffee, get comfortable, and let’s dive into this step-by-step guide. By the end, you’ll see why you need these fans on your patio!

Why You Need the VEVOR Wall Mount Fans
Before we get into the nitty-gritty of installation, let’s talk about why these fans are essential for your outdoor space.
Comfort in Every Breeze
Summer heat can turn a lovely patio into an unbearable oven. These VEVOR fans bring the perfect breeze to keep you and your guests cool. They’re powerful enough to circulate air across a large area, making your patio comfortable even on the hottest days.
Keep the Bugs Away
One of the biggest perks of these fans is their ability to keep bugs at bay. Mosquitoes and other pests are less likely to hang around when the air is moving. No more swatting at flies or dealing with itchy bites – just pure, breezy enjoyment.
Enhance Your Grilling Experience
If you love grilling as much as I do, you’ll appreciate how these fans keep smoke from lingering around your cooking area. The oscillating motion helps to disperse smoke quickly, ensuring you get the perfect sear on your steaks without a cloud of smoke in your face.
Stylish and Functional
Not only are these fans highly functional, but they also add a touch of style to your patio. With their sleek design, they blend seamlessly into any décor, enhancing the overall look of your outdoor space.
Durable and Reliable
VEVOR is known for its high-quality products, and these fans are no exception. Built to withstand the elements, they’re a reliable choice that will last you for years to come.
Now that you know why these fans are a must-have, let’s get into the installation process.
Step-by-Step Installation Guide
What You’ll Need
- VEVOR Wall Mount Fans (2 Pack 20 inch Oscillating Fans)
- Ladder
- Drill
- Screws and anchors (provided with the fans)
- Screwdriver
- Measuring tape
- Pencil
- Level
Step 1: Unboxing and Preparation
First things first, unbox your fans and make sure all parts are included. You should have the fan units, mounting brackets, screws, and anchors. Lay everything out and read through the instruction manual to familiarize yourself with the components.
Step 2: Choose the Perfect Spot
Decide where you want to mount your fans. Consider areas where you need the most airflow. For us, we chose spots that would cover our seating area and grilling station. Make sure the locations you choose have access to power outlets.
Step 3: Measure and Mark
Use your measuring tape and pencil to mark the exact spots where you’ll be drilling. It’s crucial to get this right, so take your time. Hold the mounting brackets up to the wall and mark where the screws will go. Use a level to ensure the brackets are straight.
Step 4: Drill the Holes
Carefully drill the holes where you’ve made your marks. Make sure the holes are deep enough to securely hold the screws and anchors. If you’re drilling into brick or concrete, you’ll need a masonry bit.
Step 5: Attach the Mounting Brackets
Insert the anchors into the holes, then align the mounting brackets with the holes and screw them into place. Ensure they’re firmly attached, as they need to support the weight of the fans.
Step 6: Mount the Fans
With the brackets securely in place, it’s time to mount the fans. This step might require an extra set of hands, so don’t hesitate to ask for help. Carefully lift each fan and attach it to the mounting bracket. Make sure the fans are securely fastened before letting go.
Step 7: Connect to Power
Plug your fans into the nearest power outlets. Use extension cords if necessary, but ensure they’re rated for outdoor use to avoid any safety hazards.
Step 8: Test the Fans
Turn on the fans and check their oscillating function. Ensure they’re operating smoothly and covering the desired areas. Adjust the angle if necessary to get the perfect airflow.
Step 9: Enjoy Your Transformed Patio
Sit back, relax, and enjoy the cool breeze. Your patio is now a comfortable, bug-free zone where you can entertain guests, grill to your heart’s content, and make the most of your outdoor space.
Conclusion
Installing the VEVOR Wall Mount Fans was a straightforward and rewarding project. These fans have truly transformed our patio, making it a comfortable and enjoyable space regardless of the weather. Whether you’re looking to cool down, keep bugs away, or enhance your grilling experience, these fans are a fantastic addition to any outdoor area.
Ready to transform your patio like we did? Click here to get your VEVOR Fans today!
If you’re thinking about getting these fans, I highly recommend watching the installation and review video linked below. It gives you a visual guide to the installation process and showcases just how effective these fans are in action.
Thank you for visiting With the Bickhams! If you found this guide helpful, please share it with someone who might benefit from it. Don’t hesitate to leave us a comment or ask any questions – we love hearing from you!
Watch how I had to install these fans on our patio here!
Happy installing, and enjoy your new patio experience with VEVOR Wall Mount Fans!
Affiliate Disclaimer: There are affiliate links on this page. If you click a link and make a purchase, I may receive compensation at no additional cost to you.
Legal Disclaimer: I cannot guarantee any results. All the people on this page who use this product may have results that vary. No guarantees of wealth, fame, or success. But hey, at least you tried.


Gosh seems like you may have just solved my mosquito problems here in hot and humid TX!!! Thanks
I sure hope it helps Vikki!!! I am always here to help y’all! LOL!
Craig Bickham